Page 1
Please note: Woodworking is an inherently dangerous activity. The non-woodworking techniques described here aren't all that safe, either. Sharp tools, powerful motors, big lumps of wood, chemicals, fumes, etc. can cause you serious bodily injury or even death. These pages are NOT meant as a substitute for instruction by a qualified teacher, just as an illustration of how I do certain things. I take no responsibility for any mishaps you may experience during a fit of inspiration. You've been warned.
All text and photos and the design of the "Auxiliary headstock Jig" are c. Johnna Y. Klukas, all rights reserved. Using this design to build a jig for your own use is fine, but building them for resale is not.
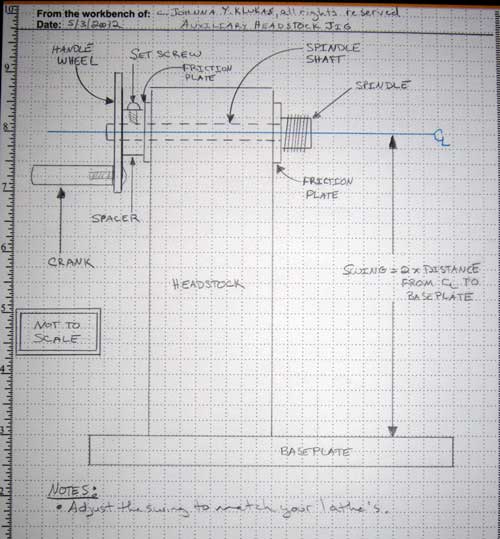
Design Drawing
This drawing shows the names of the different parts, as I refer to them in the following photographs. The drawing is NOT to scale; the jig's dimensions are dictated by the spindle you use and the swing you want. The swing is twice the distance between the center line of the spindle and the baseplate. For example, to get a 16" swing, the distance between the center line of the spindle and the baseplate is 8".
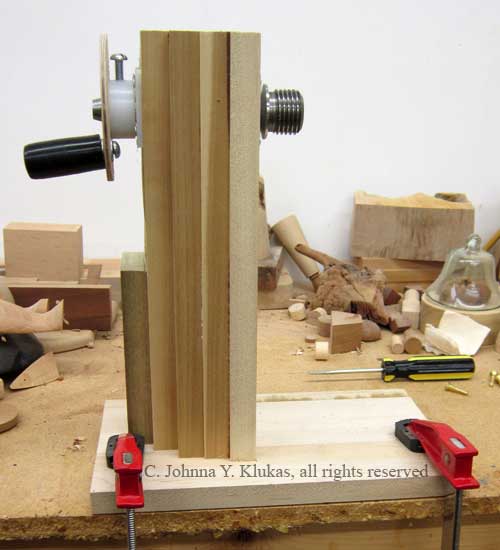
Photo 1
I built this jig mostly from leftover wood and materials from old projects. Here, the headstock is made from laminated poplar about 3" square and tall enough to accomodate the swing of my lathe, which happens to be 16". It's easy enough to adjust this by changing the length of the headstock block, and I'll mention a few other ideas for accomodating particularly large lathe swings at the end of the article.
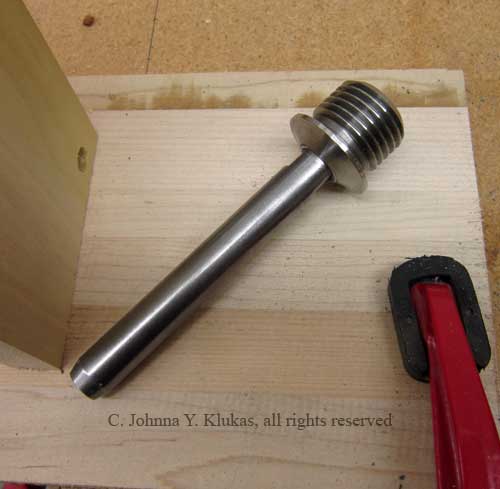
Photo 2
The only part I purchased specifically for this jig was the spindle. In this case, I bought it from Lee Valley Tools, it's meant to be used in their Veritas Carving Vise and comes in a number of common spindle sizes. At the time I'm writing this (mid-2012), it costs about $13-$15 (US). It's made of steel and has a 5/8" diameter straight shaft.
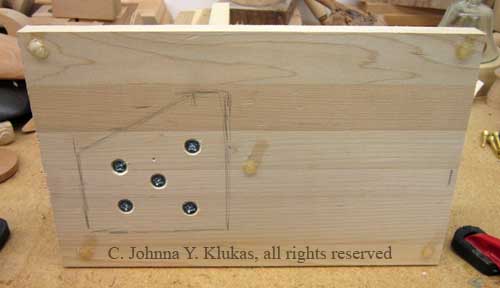
Photo 3
I attached the headstock to the base with five 1 1/2" long #10 wood screws. This jig is meant for finishing and light surface texturing, not for actual turning or anything else that's going to apply a lot of torque to the headstock, so the 1 1/2" screws should be fine.
I also glued on some rubber feet, they give just a little when clamping the jig to the workbench and even out the effects of any slight irregularities in the base board or the workbench surface.
Page last updated 30 September 2015 (formatting)