MAKING A STAVED ROCKET
Introduction
This rocket is constructed in much the same way as the checkerboard sections of the Saturn V style rocket. In this spaceship, however, I used a slightly different technique to make the staves, one that I think is both easier and safer than the method I used in the Saturn V.
Oh, and be prepared to spend a LOT of time hand sanding.
Woodworking is an inherently dangerous activity. The non-woodworking techniques described here aren't all that safe, either. Sharp tools, powerful motors, big lumps of wood, chemicals, fumes, etc. can cause you serious bodily injury or even death. These pages are NOT meant as a substitute for instruction by a qualified teacher, just as an illustration of how I do certain things. I take no responsibility for any mishaps you may experience during a fit of inspiration. You've been warned.
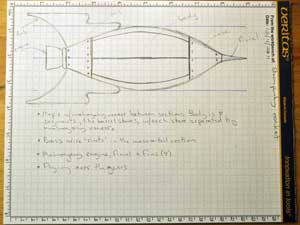
Photo 1
Start with a design drawing. It's particularly important here since the body blank has a square hollow running through it. The nose and tail sections need to be large enough to cover the hole and still have a good glue surface.
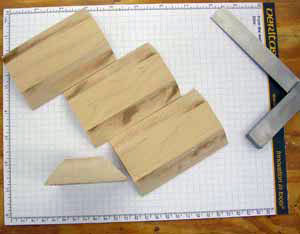
Photo 2
After working out the size of everything on the drawing, I cut one long, slightly over-long maple board. I made sure the edges were straight and parallel, then ran this long board through my table saw with the blade set at a 45 degree angle. I then cut this long board into the four shorter blocks for my rocket body. The body is only about 4 inches long, much too short to rip safely on the table saw, which is why I left the board long and cut it into the shorter sections afterwards.
"But..but...there should be 8 staves," you say. Not yet. But there will be.
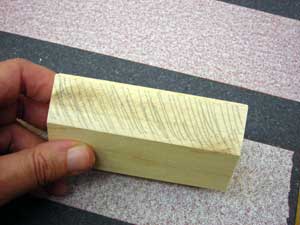
Photo 3
The mitered edges need to be as flat as possible so the glue joints will be strong and not have unsightly gaps when the rocket is turned. In the background of this picture, you can see my sanding block: a flat granite slab with adhesive-backed sandpaper stuck on it. I marked the faces of the mitered edges in pencil and flattened them by carefully sanding them by hand on the flat block. Checking after every few strokes on the sandpaper shows me the high and low spots on the mitered edges. I kept sanding, and reapplying the pencil marks, until a swipe across the sandpaper marked the whole face evenly.
Sanding the eight edges on these four blocks took me about an hour. Did I mention there would be a lot of hand sanding?
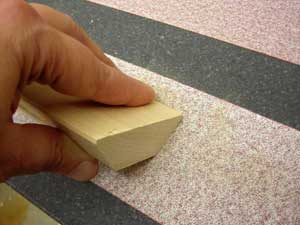
Photo 4
This picture shows the sanding process. Normally I would have both hands on the workpiece, but I'm using my right hand to hold the camera.
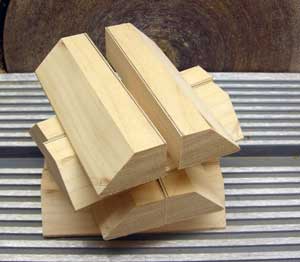
Photo 5
And here are the eight staves. I drew straight lines parallel to the long edges and the same distance in from each edge, then used my bandsaw to cut the maple blocks in half, lengthwise, between the two lines. I used my stationary disc sander to sand off the saw marks and square up the edges.
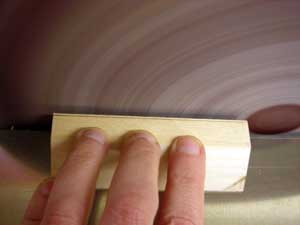
Photo 6
This is a closeup of the disc sanding process. It's extremely important to make sure the sander's table is square to the disc. Even after that, the disc itself may not be perfectly true, resulting in dips or bows in the square edge. That was the case here, so I ended up doing the bulk of the sanding on the disc sander, then taking the staves back to the granite block to finish truing up.
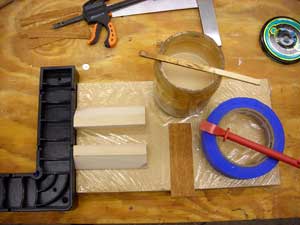
Photo 7
Once all the edges have been sanded flat and straight, the rocket body is ready to be assembled. This is the set-up I used for the assembly. In this case, all the staves have a piece of mahogany veneer between them. I used a flat piece of MDF wrapped in plastic wrap so glue wouldn't stick to it and a plastic block that acted as a reference for one edge of the glue-up. I used cold-cure veneer glue and a glue spreader to get an even coating with a reasonable open time, and low-tack masking tape to hold the staves together while the glue cured.
To reduce the risk of misalignment in the finished body, I did this part of the assembly two staves at a time.
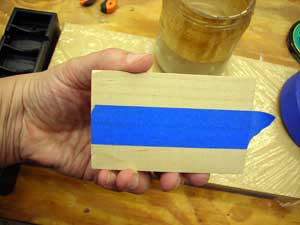
Photo 9
Once the glue tacked up a little, I taped the flat face joint, being careful to maintain the alignment.
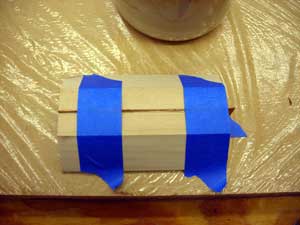
Photo 10
Once the flat face was taped, I flipped the piece over and taped the other side to keep the joint closed while the glue cured.
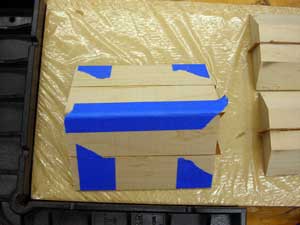
Photo 11
Once the glue cured on the first set of joints, I assembled two blocks at a time and let those cure. Again, I used low tack tape to hold the joints closed while the glue cured.
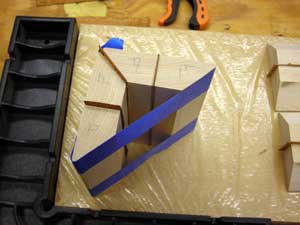
Photo 12
Taping across the open part of the joint.
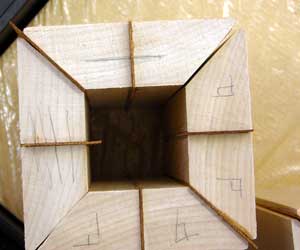
Photo 13
The two half-body sections were slightly off after gluing, so it was back to the granite block and sandpaper.
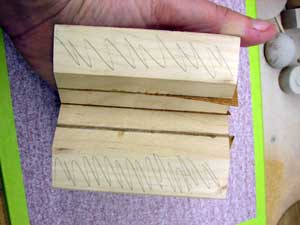
Photo 14
Again, I used pencil to mark the faces and sanded them flat on a sheet of sandpaper taped securely to my granite block.
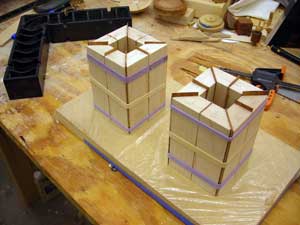
Photo 15
Once the two halves were flat and square, I glued them up with the veneer. I used rubber bands to clamp the joints this time, since I had a square form.
Note that there are two blanks in this picture. Given how time consuming it is to make one of these blanks, I made several at the same time. In the worst case, I don't have to start over from scratch if I have a problem with one blank. In the best case, I can use the spare blank to make a second version of the rocket.
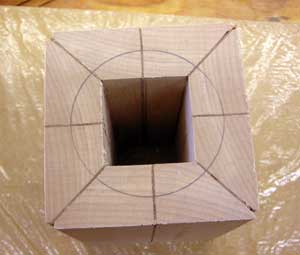
Photo 16
This is the end view of the staved rocket body. Instead of the octagonal hole I would have if I'd mitered all the staves at 22.5 degrees, my 45 and 90 degree joints mean I have a square central hole. That may make this staving technique unsuitable for some projects, but it works well here.
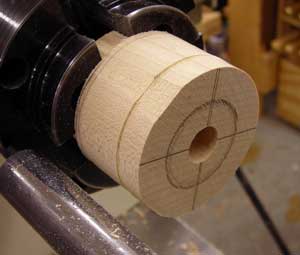
Photo 17
I used solid maple blocks for the nose and tail sections of the rockets. I drilled a 1/2" diameter hole about 1/4" deep on center in both ends of the tail block, and in what would be the interior end of the nose block (shown in the picture). I then turned the blocks round and mounted them in my scroll chuck to turn a short tenon that will fit snugly into the square hole in my staved rocket body. The circle is the rough diameter of my tenon.
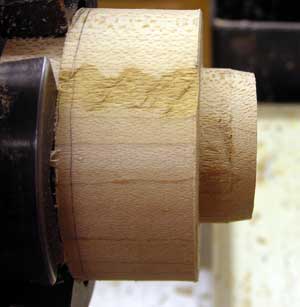
Photo 18
Fitting the tenon is a trial and error process: turn a little, test, turn a little more, test. It's CRITICAL that the shoulder of the tenon is flat and square to the tenon, or the joint between the block and the body won't hold.
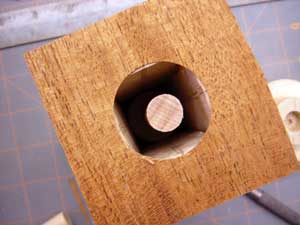
Photo 19
Once the nose and tail tenons were set, I cut holes just larger than the tenons into squares of mahogany veneer. These veneer squares go between teh blocks and the staved body. And now the purpose of the 1/2" holes in the tenons becomes clear: I glued in a 1/2" diameter dowel to tie the nose and tail blocks together. The veneer is face grain, mated to the end grain of the staved body and the nose and tail blocks. I don't expect a lot of wood movemnet in such a small surface area, but there could be some. The dowel and tenons will help to keep everything together.
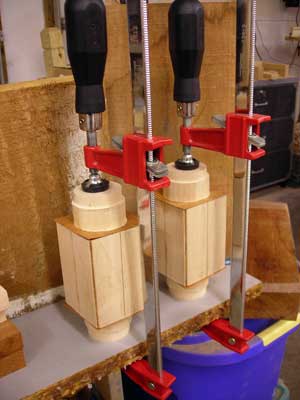
Photo 20
The nose and tail blocks, with their veneer separators, clamped up.
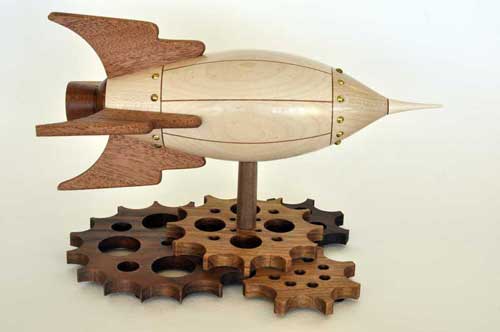
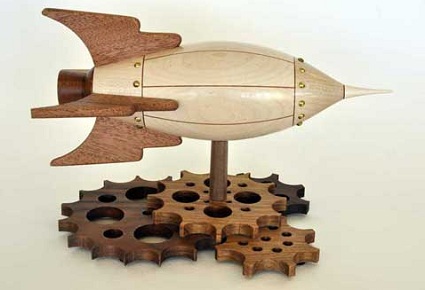
Steampunk Still Life (2011)
The resulting rocket. Maple, mahogany, butternut and walnut, with brass. About 8" L x 6" H x 6" W.