ADDING RIVETS TO A ROCKET

Introduction
Accurate layout is the trick here. The rivets need to be evenly spaced for things to look right.
Woodworking is an inherently dangerous activity. The non-woodworking techniques described here aren't all that safe, either. Sharp tools, powerful motors, big lumps of wood, chemicals, fumes, etc. can cause you serious bodily injury or even death. These pages are NOT meant as a substitute for instruction by a qualified teacher, just as an illustration of how I do certain things. I take no responsibility for any mishaps you may experience during a fit of inspiration. You've been warned.
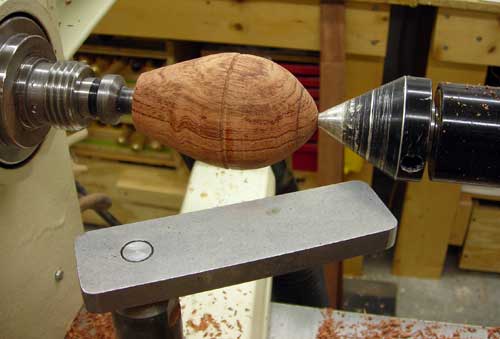
Photo 1
This is a small rocket box in bubinga that I want to decorate by adding rivets around the nose. The rocket has been finish-turned, but has not yet been sanded. I've pencilled in the line that I want the rivets to follow. I'm also using a special flat toolrest. You can use a regular toolrest, you'll just have to be more careful. More on that later.
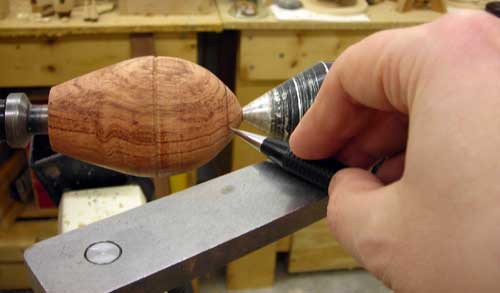
Photo 2
I've decided on six rivets, and I'm using the indexing feature of my lathe to help me mark out the locations. Here's where the flat rest comes in handy. I'm using a pencil with a cylindrical barrel, and I've set the height of the rest so the point of the pencil is close to the lathe's rotational centerline. Being a little high or low of the centerline isn't critical, but keeping the pencil at exactly the same height for each rivet is. The procedure is: pick your start spot, lock the indexing feature of your lathe, mark the spot, move to the next index.
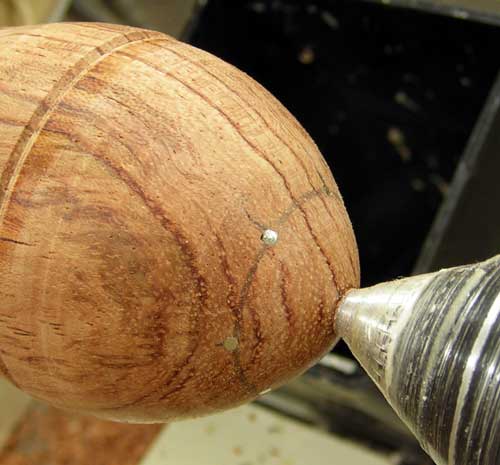
Photo 3
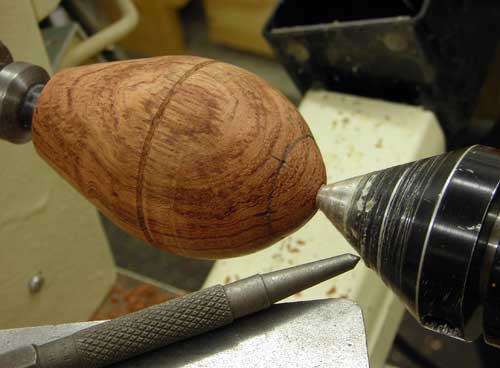
Once the rivet locations have been marked out, I use a centerpunch to make an indentation at the mark. This gives the drill bit something to locate on when I drill out the hole for the rivet. I use a centerpunch rather than an awl because the conical mark the punch leaves is just the right size for the drill bit tip. I push the punch in by hand, it doesn't take much force in most woods.
The size of the drill bit used depends on the size of the wire I'm using for rivets. Here, I'm using 14 gauge nickel wire. It's just a bit over 1/16 inch in diameter, so a 1/16 inch drill bit gives me a hole that will grab the wire enough to hold it in without requiring glue. I drill the holes to about 1/8" deep.

Photo 4
These are the tools I use for making and installing the rivets. I buy spools of copper, brass and nickel wire from a jewellery supplier. Using wire cutters, I clip the wire into pieces about 3/16" long ahead of time and store them in a little plastic tub with a tight-fitting lid. To insert the wire in the drilled holes, I use a pair of needle-nose pliers to grip the pieces of wire and a regular hammer to tap the wire into the hole. When the wire is seated in the hole, I use a small file to smooth it flush with the surface of the rocket.
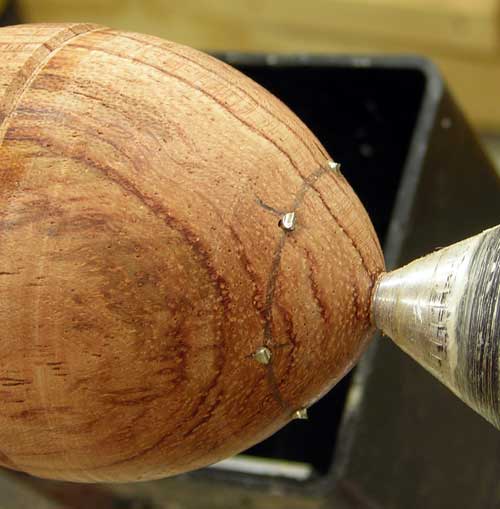
Photo 5
I've inserted the wires but I haven't filed them back yet. You can just see the rough ends sticking out of the holes. The wire should be long enough to fill the hole completely when it's tapped in all the way, and stick out enough for the rough-cut end of the wire to be filed away. If the wire is too short, the filed bit won't fill the hole completely and it looks like a line rather than a nice circular rivet.
Photo 6
This is what the rivets should look like after filing them flush. The wire fills the hole completely, and doesn't stick up from the surface.
Once the wire rivets have been filed back, sand the rocket through all the grades. You're ready to add the nose spike, engine, fins, finish, etc.
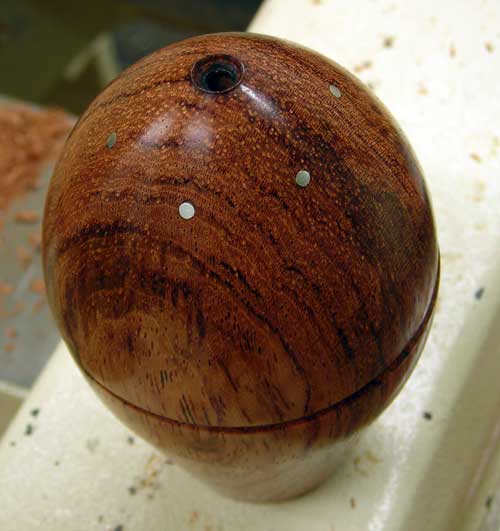
Photo 7
Sanded to P4000 and finished with a shellac and wax friction polish.

Photo 8
"Night Ship" (2009). This is another way to use the rivet technique. Here, I've used copper, nickel and brass wire on ebonized walnut. The technique is the similar to the one used for rivets, except that the placement of the wire is random. I didn't ebonize the walnut until after I installed the wires and filed and sanded everything back.