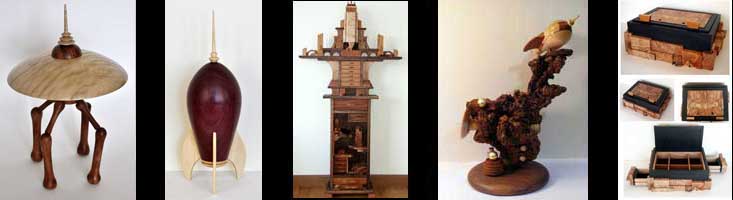
MAKING A THREE-ENGINE ROCKET
Introduction
The turning for the three engines needs to be done carefully because the they should be as close to identical as you can make them, but the real challenge is fitting the fins to both the rocket body and the engine pods so everything is aligned properly. Patience is a virtue here.
Woodworking is an inherently dangerous activity. The non-woodworking techniques described here aren't all that safe, either. Sharp tools, powerful motors, big lumps of wood, chemicals, fumes, etc. can cause you serious bodily injury or even death. These pages are NOT meant as a substitute for instruction by a qualified teacher, just as an illustration of how I do certain things. I take no responsibility for any mishaps you may experience during a fit of inspiration. You've been warned.
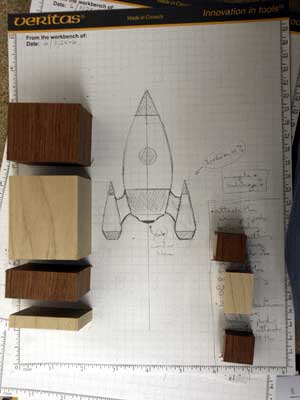
Photo 1
The whole process starts with a design. I prefer graph paper to plain to work out the proportion and dimensions. Then I choose wood species appropriate to the design. The design may change as the rocket is built, but its still essential to have something to start from.
In this case, I chose maple (light sections) and bubinga (dark sections) as the species for the rocket components.
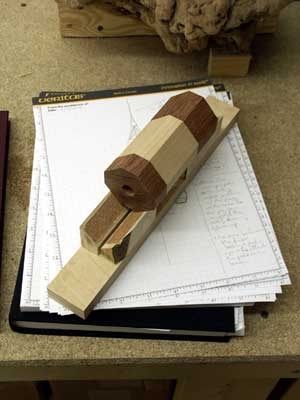
Photo 2
Once glued up, I prep the rocket body blank. Using a sled-like jig to support the blank, I cut the corners off on a bandsaw to save turning time. The ½ diameter hole in the base of the rocket body blank will hold a decorative piece later on, but, for now, it helps to hold the rocket body blank on the lathe.
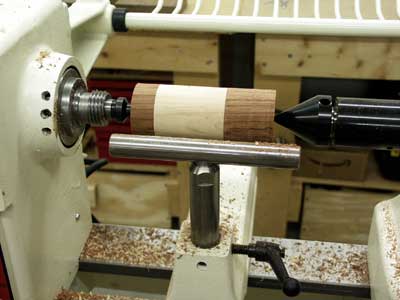
Photo 3
The rocket body blank in progress.
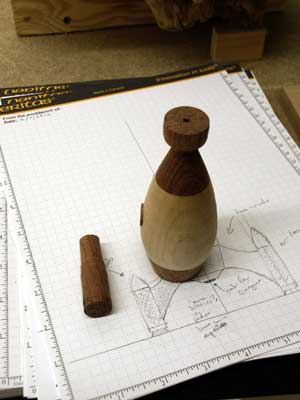
Photo 4
When the rocket is near its final shape, I drill the ½ hole for the porthole. Because pre-made dowels are not readily available in bubinga (dark wood), Ive turned my own to the size I need.
Ill set the rocket body blank aside until the porthole glue sets, then turn it to its final shape and sand it.

Photo 5
Next come the three engine pods. The first one becomes the reference for the second and third one, since the three pods need to be close to identical.
Notice the two rocket bodies on the workbench in the background. I like to make two or three at the same time so that if I screw up one, I have a spare ready to go. If all goes well, I have an extra rocket for future use.

Photo 6
After the engine pods are done, the fins need to be made. I have a template fin (extreme left) that I use to draw the pattern on my fin blanks. The fins are then cut out and shaped with drum sanders and hand sanding. Making and fitting the fins to the engine pods and the rocket body is the most time consuming part of the whole process....

Photo 7
....Besides the outside shape, each fin has to be sanded so it conforms to the curvature of both the rocket body and the engine pod. I use this jig to sand the engine pod and rocket edges of the fins accordingly.
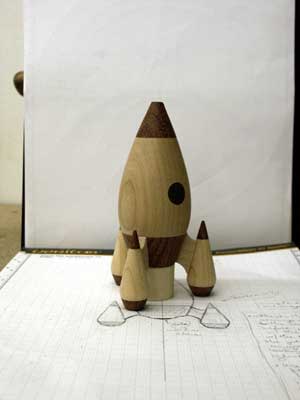
Photo 8
Once the fins have been fitted, I glue them to the engine pods and the rocket body. The large dowel underneath the rocket body supports the body at the right height until the glue sets.
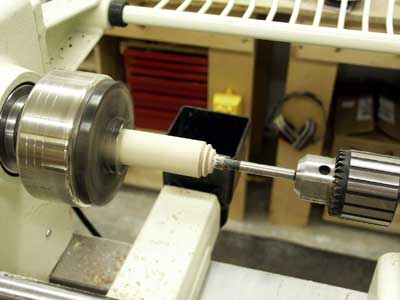
Photo 9
Next up is the decorative bit for the base of the rocket body. It consists of a maple disc with a bubinga cabochon in the center. This photo shows the partially-turned maple disc being drilled out for the cabochon.
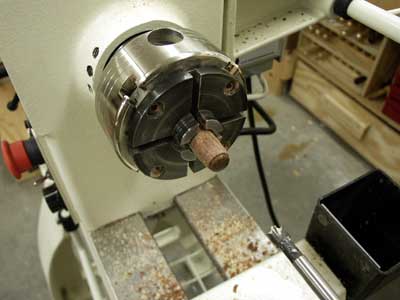
Photo 10
The bubinga cabochon for the base disc. Ill make a ½ diameter tenon behind the shaped and sanded cab, cut it off the dowel and glue it into the decorative bit.

Photo 11
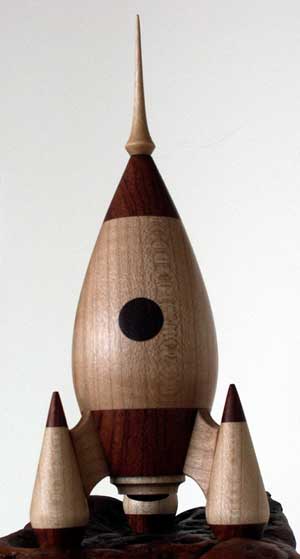
The completed rocket. Usually I use satin polyurethane gel varnish for the finish, though I occasionally use satin spray lacquer instead. With either finish, I apply three coats and buff lightly in between with ultra-fine synthetic steel wool.